


Installing a Reflex Minibar on a work vehicle starts with one important question:
Are the lightbar, mounting plate and proposed vehicle installation actually compatible?
That needs to be answered before drilling, wiring or choosing a convenient position on the vehicle.
For Australian councils, utilities, traffic management operators, construction fleets, emergency-support vehicles and other commercial operators, warning equipment often becomes a permanent part of the vehicle’s working setup. The mounting arrangement therefore needs to be considered as part of the complete vehicle safety system rather than simply as a way of attaching a light.
Australian Warning Systems’ Reflex Minibar Mounting Plate, SKU 381-6367, is specifically listed for ECCO Reflex Mini Lightbar models 500-5585 and 500-5590.
That documented compatibility gives this installation guide a clear starting point.
This article does not provide a universal drilling template or generic bolt sequence. Different vehicles and lightbar configurations require different installation decisions. Instead, it explains how to approach Reflex Minibar fitment properly, from identifying the exact equipment through to positioning, wiring, inspection and fleet use.
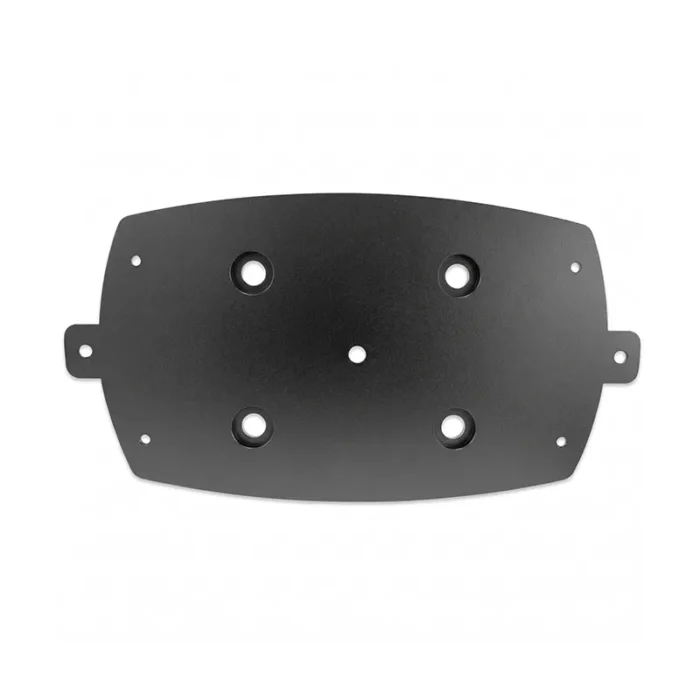
Reflex Minibar installation begins by confirming compatibility between the lightbar, mounting hardware and vehicle application.
Start With the Exact Reflex Minibar
“Reflex” should not be treated as a universal mounting specification.
Before looking at the vehicle, record the exact lightbar model and configuration.
For the AWS 381-6367 mounting plate, the documented compatible products are:
- ECCO Reflex 500-5585
- ECCO Reflex 500-5590
This distinction matters because even products within the same warning-light family can have different dimensions, mounting configurations or installation requirements.
Before progressing with a Mini Lightbar Mounting Bracket Australia installation, confirm:
- exact manufacturer and model;
- lightbar configuration;
- compatible mounting plate or bracket;
- installation requirements supplied for the equipment;
- proposed vehicle location;
- available clearance;
- electrical requirements; and
- surrounding vehicle equipment.
Starting with the product identification prevents the installation from becoming a process of modifying available hardware until something appears to fit.
How Do You Mount a Reflex Minibar?
A practical Reflex installation can be assessed through three separate connections.
1. Reflex Minibar to Mounting Plate
First confirm that the mounting hardware is intended for the exact warning light.
For AWS product 381-6367, the documented compatibility is with ECCO Reflex models 500-5585 and 500-5590.
This is the first compatibility check.
Physical size alone is not enough. A plate that appears large enough for a mini lightbar is not necessarily the correct Reflex mini lightbar mounting plate.
2. Mounting Plate to Vehicle
Once lightbar-to-plate compatibility is established, assess the proposed supporting structure.
This is a separate decision.
A plate can be correct for the warning light without every roof, rack, canopy or other vehicle structure automatically being appropriate for the installation.
Consider the actual vehicle construction and follow the applicable mounting requirements.
3. Installed Position to Warning Function
The final consideration is how the warning light will perform once the vehicle is working.
Look at the vehicle with its normal equipment fitted.
A mechanically secure installation can still be poorly positioned if ladders, cargo, signage or other equipment routinely obstruct the warning light.
The three questions are therefore:
Does the lightbar fit the plate?
Can the plate be appropriately installed on the vehicle?
Does the finished position support the intended warning function?
All three should be answered before installation is considered complete.
Prepare the Vehicle as It Actually Works
A common installation mistake is assessing a bare vehicle in a workshop.
A work ute may later carry ladders.
A service van may have roof-mounted equipment.
A utility vehicle may have antennas, racks and a canopy.
A traffic management vehicle may combine its mini lightbar with signage, directional warning lights or other equipment.
Before confirming the installation, account for:
- roof racks;
- ladder racks;
- antennas;
- canopies;
- roof-mounted signage;
- work lights;
- communications equipment;
- other warning lights;
- tool storage; and
- normal cargo.
The objective is to evaluate the Reflex Minibar in the vehicle’s normal operating configuration.
That produces a more realistic assessment than simply asking whether there is enough empty space to install it.
How Do You Install a Mini Lightbar Mounting Plate?
There is no single installation sequence that should be applied to every vehicle.
The actual method needs to follow the requirements for the lightbar, mounting hardware and vehicle application.
However, a sensible planning sequence can be used.
Step 1: Confirm Product Compatibility
Identify the exact Reflex Minibar and verify the compatible mounting hardware.
Do this before modifying the vehicle.
For the AWS 381-6367 LED mini lightbar mounting plate, compatibility should be checked against its specified Reflex models.
Step 2: Assess the Supporting Structure
Determine whether the proposed mounting surface is suitable for the intended installation.
Do not assume that every roof panel, canopy, rack or vehicle structure can accept the same installation method.
If structural suitability is uncertain, obtain appropriate installation advice.
Step 3: Test the Proposed Position
Before permanently fixing the equipment, consider the complete lightbar position.
Look at the vehicle from the directions where the warning signal needs to be seen.
Check whether nearby equipment could interfere with the intended visibility.
Step 4: Plan Electrical Routing
Wiring should be considered before the mounting hardware is permanently installed.
Think about:
- cable entry;
- cable protection;
- movement or abrasion;
- nearby vehicle equipment;
- electrical connection; and
- future service access.
This can prevent a mechanically convenient mounting location from creating an unnecessarily difficult electrical installation.
Step 5: Follow the Applicable Installation Instructions
Use the mounting method and hardware specified for the equipment being installed.
Where the installation involves structural modification, permanent vehicle wiring or uncertainty around the supporting structure, professional installation may be appropriate.
Step 6: Inspect the Complete Installation
Once installed, assess the system as a whole.
Check:
- mounting hardware;
- warning-light operation;
- cable routing;
- surrounding equipment;
- physical movement;
- service access; and
- intended warning visibility.
The job is not complete simply because the lightbar switches on.
Can a Reflex Minibar Be Mounted on a Roof Rack?
This question needs a qualified answer.
The AWS 381-6367 information establishes compatibility between the mounting plate and specified Reflex Minibars. It does not establish that every roof rack is automatically suitable for the installation.
A proposed roof-rack installation therefore requires its own assessment.
Consider:
- rack design and construction;
- appropriate attachment method;
- normal loads carried on the rack;
- ladders or materials that could obstruct the light;
- cable routing;
- vibration;
- service access; and
- the intended warning position.
This leads to an important distinction:
Lightbar-to-plate compatibility does not automatically establish plate-to-roof-rack compatibility.
That principle applies beyond Reflex products as well.
Fixed and Magnetic Reflex Minibars Are Different Installation Decisions
The source draft identifies fixed and magnetic configurations within the Reflex range.
These configurations should not be treated as interchangeable installation methods.
A permanently mounted Reflex Minibar may be appropriate where warning equipment forms an established part of a fleet vehicle’s operational setup.
A compatible magnetic configuration serves a different mounting requirement.
The decision should be based on the exact product configuration and intended vehicle application rather than assuming that permanent mounting is always preferable.
This is another reason model and configuration identification needs to happen before installation planning.
Installation Mistakes Worth Avoiding
Most avoidable Reflex Minibar installation problems start during planning rather than installation itself.
Assuming every Reflex product uses the same hardware
Confirm the exact model and documented compatibility.
Choosing the vehicle position first
Identify the lightbar and compatible mounting arrangement before committing to a location.
Treating a roof rack as an automatically suitable mounting structure
A rack needs to be assessed in its own right.
Planning wiring after mounting
Cable routing should influence the installation plan rather than being solved afterwards.
Assessing an empty work vehicle
Consider ladders, racks, signs, tools and normal loads before confirming the position.
Ignoring maintenance access
The lightbar, mounting hardware and electrical connection may need future inspection.
Treating secure mounting and warning visibility as the same thing
Mechanical security is essential, but the warning equipment also needs to perform its intended function in the completed vehicle configuration.
These are practical planning issues rather than reasons to make the installation unnecessarily complicated.
Why Mounting Plate Construction Still Matters
The AWS 381-6367 Reflex Minibar Mounting Plate is described as being manufactured from heavy-duty powder-coated steel.
For work vehicles, mounting hardware may experience regular road use, vibration and outdoor exposure.
Construction therefore matters.
But “heavy duty” should not become a substitute for compatibility.
A useful hierarchy is:
Correct product compatibility → appropriate vehicle installation → suitable construction → ongoing inspection
All four contribute to a dependable warning-light installation.
A robust plate used with the wrong lightbar or an inappropriate supporting structure does not become suitable simply because it is heavy duty.
Think Differently About Fleet Installations
A one-off vehicle installation and a 30-vehicle fleet fitout are different problems.
For fleets, consistency can have practical value.
Where vehicles, warning lights and mounting arrangements are genuinely compatible, standardisation may help with:
- workshop documentation;
- installation procedures;
- replacement equipment;
- maintenance;
- spare parts;
- inspections; and
- future fleet planning.
But standardisation should follow compatibility.
A council may operate utes, vans, trucks and specialist vehicles with very different body configurations. Using the same commercial vehicle mini lightbar mount everywhere purely for consistency may not be appropriate.
A better approach is to establish approved configurations for particular vehicle groups.
For example:
Vehicle group → Reflex model → mounting plate → installation configuration → inspection requirements
That creates useful fleet documentation without assuming every vehicle is identical.
Plan for Inspection Before the Vehicle Leaves the Workshop
Mounting equipment should remain part of routine vehicle inspection after installation.
The appropriate maintenance requirements depend on the equipment, vehicle and operating environment, but practical checks can include:
- loose or damaged hardware;
- movement around mounting points;
- visible corrosion or coating damage;
- damaged cable protection;
- physical damage;
- changes to surrounding equipment; and
- new obstruction of the warning light.
Avoid inventing a universal inspection interval.
Instead, follow relevant manufacturer requirements and incorporate the mounting arrangement into the organisation’s existing vehicle or fleet maintenance program.
Vehicles exposed to demanding operating environments may warrant additional visual checks as appropriate.
Reflex Minibars Within a Complete Vehicle Safety System
A Reflex Minibar provides a visual warning around the vehicle.
Its mounting plate helps support that equipment.
Neither should be considered the entire vehicle safety system.
Depending on the application, a fleet vehicle may also use:
- beacons;
- directional warning lights;
- arrow boards;
- vehicle-mounted message displays;
- audible warning systems;
- traffic-management equipment;
- vehicle signage; and
- connected digital-alerting technology.
These technologies perform different functions.
Physical warning lights communicate directly to people around the vehicle. Directional and message systems can communicate additional information, while connected digital-alerting technologies can extend supported hazard information beyond the immediate visual warning area.
For Australian Warning Systems, this broader approach is important.
The question is not simply:
“How do we mount another warning light?”
It is:
“How should this vehicle communicate its presence or the hazard it is responding to?”
The Reflex Minibar and its mounting system are one part of answering that question.
When Professional Installation Makes Sense
Professional installation may be particularly valuable where:
- permanent vehicle modification is required;
- structural suitability is uncertain;
- permanent electrical work is involved;
- several warning systems need to work together;
- a repeatable fleet specification is being developed; or
- the vehicle performs safety-critical roadside work.
Australian Warning Systems provides installation services for work, fleet, emergency and specialist vehicles from its Hallam facility.
For fleet applications, the benefit is not simply having someone attach a mounting plate.
It is the ability to consider the warning light, mounting hardware, electrical installation, vehicle configuration and operational purpose together.
Final Reflex Installation Checklist
Before completing a Reflex Minibar installation, confirm:
- exact ECCO Reflex model;
- lightbar configuration;
- compatible mounting plate;
- mounting-plate requirements;
- proposed supporting structure;
- normal vehicle equipment;
- warning-light position;
- cable routing;
- service access;
- installation requirements;
- completed light operation; and
- future inspection requirements.
If the vehicle is part of a fleet, document the final approved configuration.
That information can become useful when similar vehicles are fitted, equipment is replaced or the fleet is renewed.
Final Thoughts
Installing a Reflex Minibar properly starts with identification and compatibility, not with tools.
For AWS mounting plate 381-6367, begin by confirming the specified ECCO Reflex application. Then assess whether the complete mounting arrangement is appropriate for the individual vehicle.
Consider how the vehicle operates in the real world.
Account for racks, ladders, antennas, signage, cargo and other warning equipment. Plan the electrical installation before permanent mounting. Follow the applicable product and installation requirements, and include the mounting hardware in future vehicle inspections.
A Mini Lightbar Mounting Bracket Australia may be a relatively small component, but its role is important.
For a commercial fleet, the objective should not simply be:
“Mount the Reflex Minibar.”
It should be:
“Integrate the warning light appropriately into the vehicle’s overall safety configuration.”
That distinction better reflects how professional warning systems should be planned.
For model-specific details, link readers naturally to the AWS Reflex Minibar Mounting Plate
FAQs
How do you mount a Reflex Minibar?
Start by identifying the exact Reflex model and confirming compatible mounting hardware. Then assess the proposed vehicle structure, warning-light position and electrical route before following the applicable installation instructions.
What mounting plate fits an ECCO Reflex Minibar?
It depends on the exact model. The AWS 381-6367 Reflex Minibar Mounting Plate is specifically listed for ECCO Reflex models 500-5585 and 500-5590.
Can a Reflex Minibar be mounted on a roof rack?
Potentially, but compatibility between the lightbar and mounting plate does not automatically make every roof rack suitable. The rack, attachment method, loads, wiring, vibration and final warning position should be assessed.
Are Reflex Minibar mounting plates universal?
No universal compatibility should be assumed. Identify the exact Reflex model and use mounting hardware documented as compatible with that product.
Can I install a Reflex Minibar mounting plate myself?
That depends on the vehicle, mounting arrangement and work required. Where structural modification, permanent electrical work or uncertainty about the installation is involved, professional installation may be appropriate.
Does mounting position affect Reflex Minibar visibility?
Yes. Ladders, roof racks, cargo, antennas, signage and other equipment can affect the warning light’s intended visibility. Assess the completed vehicle in its normal working configuration.
Is a heavy-duty mounting plate automatically suitable for fleet vehicles?
No. Construction quality matters, but compatibility and correct installation come first. A heavy-duty plate still needs to suit the specific lightbar and vehicle application.
Should fleets standardise Reflex Minibar installations?
Standardisation can be useful where vehicle groups, warning lights and mounting configurations are genuinely compatible. Mixed fleets may require different approved configurations for different vehicle types.