


Where a mini lightbar is mounted can be just as important as the warning light selected.
On an Australian work ute, the cab roof may seem like the obvious location. A service van, however, may already have ladders, roof racks and antennas occupying that space. A tray vehicle may have a headboard that provides another possible mounting position, while a utility ute with a canopy requires a completely different assessment.
There is no single Mini Lightbar Mount Australia solution that suits every vehicle.
The appropriate mounting position depends on the vehicle’s configuration, what it carries during a normal working day, the warning visibility required, the lightbar’s mounting requirements and the conditions in which the vehicle operates.
For councils, utilities, construction fleets, traffic management operators and commercial vehicle owners, this makes mounting a vehicle-level decision rather than simply a hardware decision.
This guide compares the main mounting positions used on Australian work vehicles, including the roof, roof rack, canopy and headboard, and explains what should be considered before choosing between them.
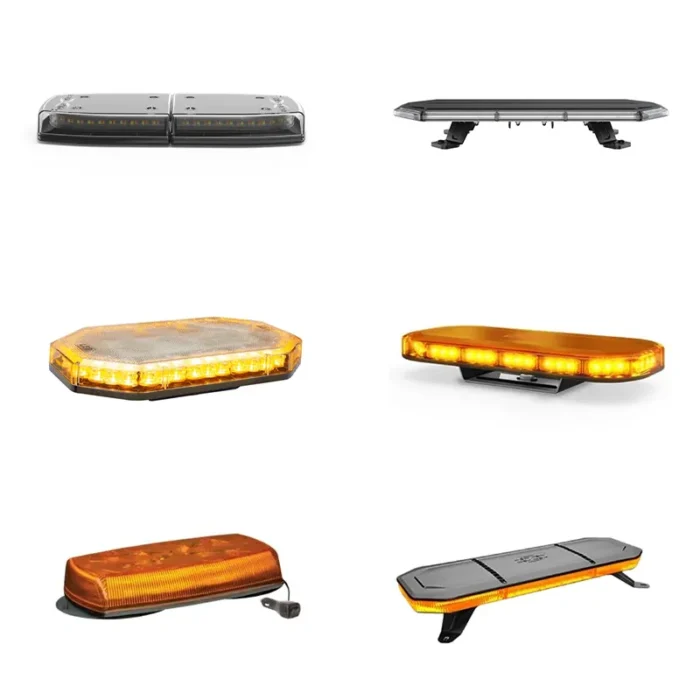
Roof, rack, canopy and headboard mounting each require consideration of vehicle configuration, visibility and normal working loads.
Start With the Vehicle’s Normal Working Configuration
Before deciding where the mini lightbar should go, look at the vehicle as it actually works.
An empty ute parked in a workshop can look very different once ladders, tools, signage or equipment have been loaded.
Consider:
- Is there already a roof rack or ladder rack?
- Does the vehicle use a canopy?
- Are antennas or work lights installed?
- Does equipment regularly extend above the cab?
- Is signage mounted on the roof or rear structure?
- Does the vehicle regularly carry tall loads?
- Where are other warning lights positioned?
- Does the vehicle operate mainly on roads, worksites or both?
These factors can change which mounting locations are practical.
The goal is not simply to find enough space for a vehicle mini lightbar mount. The position should work with the complete vehicle and support the intended warning function during normal operations.
How Do You Decide Where to Mount a Mini Lightbar?
The most appropriate position usually comes from balancing several factors rather than following one universal rule.
Warning visibility
Consider where other road users, workers or site personnel are likely to be in relation to the vehicle.
Vehicle structure
The proposed location needs to be appropriate for the specific mounting arrangement. A cab roof, canopy, rack and headboard are different structures and should not automatically be treated as interchangeable.
Equipment carried
Ladders, roof loads, toolboxes and signage can affect the practical position of a warning light.
Mini lightbar requirements
The mounting position still needs to work with the manufacturer’s specified mounting method for the particular lightbar.
Wiring
Think about how the electrical connection will reach the warning light before finalising its location.
Operating environment
A council vehicle working mainly on suburban roads can have different requirements from a civil vehicle regularly operating on rough worksites.
Once these points have been considered, the possible mounting positions become much easier to compare.
Option 1: Direct Roof Mounting
A cab or vehicle roof is one of the first locations many operators consider for a mini lightbar.
Often considered for
- work utes
- council vehicles
- service vehicles
- traffic management vehicles
- selected vans
- commercial fleet vehicles
Why fleets consider it
A roof position can place the warning light above much of the vehicle body and may provide a clear elevated location when the vehicle configuration allows it.
It can also provide a relatively clean installation where the roof is not already occupied by racks, ladders, antennas or other equipment.
A suitable LED mini lightbar mounting bracket or mounting arrangement may be used where it is designed for the specific lightbar and application.
What needs to be checked
Direct roof mounting should not begin with drilling.
The installer should first consider:
- roof profile and construction
- interior roof components
- headlining
- available wiring route
- surrounding antennas
- roof channels
- other warning equipment
- future service access
- anything normally carried above the vehicle
A technically secure roof installation can still be poorly positioned if normal work equipment later blocks the warning light.
For that reason, assess the vehicle when it is configured for work rather than only when it is empty.
Option 2: Roof Rack Mounting
Can a Mini Lightbar Be Mounted on a Roof Rack?
A roof rack can provide a practical mounting location in some applications, particularly when the vehicle already uses a rack system.
But the presence of a roof rack does not automatically mean it is suitable for mounting warning equipment.
Often considered for
- trade utes
- service vans
- utility vehicles
- vehicles already fitted with permanent rack systems
Why operators consider it
Using an existing rack can sometimes provide an elevated location without using the vehicle roof itself as the direct mounting surface.
It may also offer more flexibility where the roof is difficult to access or already contains other equipment.
What needs to be checked
The complete roof-rack setup matters.
Ask:
- Is the rack suitable for the proposed mounting arrangement?
- How will the lightbar be attached?
- What loads are normally carried?
- Will ladders obstruct the warning light?
- Will equipment sit directly beside or above it?
- Can wiring be routed appropriately?
- How will the installation respond to normal vehicle vibration?
- Can the lightbar still be inspected easily?
A roof mount for mini lightbar applications should therefore be evaluated with the rack loaded as it normally would be.
A light that is clearly visible on an empty rack may look very different after ladders, conduits or other trade equipment are added.
Option 3: Canopy Mounting
Canopies are common across Australian utility, trade and fleet vehicles and can create another potential location for warning equipment.
Often considered for
- utility utes
- service vehicles
- construction fleets
- council vehicles
- infrastructure and maintenance vehicles
Why fleets consider it
A canopy may provide an alternative where the cab roof already carries racks, antennas or other equipment.
For some vehicle configurations, it can also position the warning light closer to the working area of the vehicle.
What needs to be checked
Not every canopy should be treated as the same mounting structure.
Consider:
- canopy construction
- available mounting surface
- doors and lifting panels
- equipment stored or carried above it
- wiring access
- final lightbar height
- front, side and rear visibility
- servicing requirements
The position also needs to be assessed relative to the cab.
For example, a canopy-mounted mini lightbar may be visible from certain approaches but partly obscured from others depending on the height and design of the vehicle.
This is why the vehicle’s actual role needs to guide the decision.
Option 4: Headboard or Existing Vehicle Structure
Tray vehicles, utes and some trucks may have a headboard or other body structure that can potentially support warning equipment.
Often considered for
- tray-back utes
- service bodies
- construction vehicles
- utility vehicles
- commercial trucks
Why operators consider it
A headboard installation can integrate warning equipment with the working body of the vehicle instead of using the cab roof.
This can be useful where roof equipment is regularly carried or where similar fleet bodies provide an opportunity for consistent installation.
What needs to be checked
Load height is particularly important.
A warning light may be clearly visible when the tray is empty but become obstructed when materials, equipment or machinery are carried.
Check:
- normal load height
- headboard construction
- warning-light position
- nearby work lights
- wiring
- rear and side visibility
- equipment normally transported
A strong structure alone does not guarantee an effective warning-light position.
Which Mounting Position Suits Different Work Vehicles?
Rather than declaring one position the “best”, it is more useful to compare the locations each vehicle type may need to assess.
| Vehicle Type | Mounting Locations to Assess | Main Considerations |
| Work ute | Roof, canopy, headboard, rack | Ladders, loads, canopy height and equipment |
| Service van | Roof, roof rack | Overall height, ladders, antennas and wiring |
| Tray vehicle | Headboard, cab roof | Load height and equipment obstruction |
| Council vehicle | Roof, canopy, rack | Warning visibility and repeatable fleet fitment |
| Utility vehicle | Roof, canopy, rack | Service equipment, ladders and vehicle role |
| Traffic management vehicle | Roof, vehicle structure | Interaction with signage and other warning systems |
| Construction vehicle | Roof, canopy, structure | Worksite exposure, vibration and loads |
| Emergency/support vehicle | Application dependent | Complete warning-system configuration |
This application-based approach is particularly useful for a commercial vehicle mini lightbar mount because commercial fleets rarely operate every vehicle in exactly the same way.
How Mounting Location Changes the Installation
Changing the mounting position changes more than where the light sits.
A direct roof installation can involve considerations around the roof structure, interior access and cable routing.
A roof-rack installation introduces questions around the rack itself, carried loads and how the warning light is attached.
A canopy installation requires consideration of canopy construction, doors, wiring and equipment stored above it.
A headboard installation needs to account for the body configuration and the loads the vehicle regularly carries.
The exact installation method should therefore follow the requirements of:
The mini lightbar + mounting hardware + mounting structure + vehicle.
Generic installation instructions should not replace the documentation provided for the specific warning light and mounting equipment.
Where permanent vehicle modification, structural uncertainty or electrical work is involved, professional installation may be appropriate.
Mounting Hardware Still Needs to Match the Lightbar
Choosing the mounting location and choosing the mounting hardware are related, but they are not the same decision.
Even after deciding that a roof, canopy or headboard is the preferred location, the bracket or mini lightbar mounting plate Australia still needs to suit the actual lightbar.
Australian Warning Systems provides dedicated mounting plates for selected mini lightbars rather than treating every mounting plate as universally interchangeable.
This is an important distinction.
The vehicle determines where the warning light may be appropriately positioned.
The lightbar specification helps determine which mounting hardware is compatible.
Both questions need an answer before installation begins.
Common Mounting Mistakes
Most problems begin when one part of the installation is considered in isolation.
Choosing the location before checking lightbar requirements
A convenient location is not useful if the intended mounting system does not suit it.
Drilling before planning the wiring
The electrical route should be considered before the final mounting position is committed.
Assuming a roof rack is automatically suitable
A rack may carry other equipment and introduce different attachment, load and vibration considerations.
Ignoring normal vehicle loads
Ladders, tools, cargo or signs can change the visibility of a mini lightbar after installation.
Copying another fleet vehicle without checking differences
Two vehicles that look similar can have different bodies, racks, accessories or operating roles.
Forgetting future maintenance
Mounting hardware and electrical connections may need inspection or servicing. The installation should allow reasonable access.
Avoiding these mistakes generally requires more planning rather than more equipment.
Does Mounting Position Affect Mini Lightbar Visibility?
Yes.
The purpose of a warning light is to communicate visually, so the completed position should be assessed from the areas where the warning signal needs to be noticed.
This is not simply about mounting the light as high as possible.
A higher position may still be compromised by nearby equipment. Similarly, a canopy or headboard position may work well for one vehicle but provide less suitable sightlines on another.
A useful practical assessment is to configure the vehicle for a normal working day and view it from relevant directions.
Look for:
- ladders directly in front of the light
- roof loads beside or above it
- signs or antennas affecting sightlines
- equipment added after the original installation
- tall tray loads
- other warning lights competing for the same space
Fleet vehicles should also be reassessed if their configuration changes.
A warning-light location that worked when the vehicle was originally fitted out may need reconsideration after new racks, canopies or equipment are added.
Mini Lightbars Within a Wider Vehicle Safety System
A mini lightbar provides an immediate visual warning around a work vehicle, but it may be only one component of the complete safety configuration.
Depending on the application, vehicles may also use beacons, directional warning lights, message displays, audible warning systems and traffic-management equipment.
Connected digital-alerting technology can add another layer by extending hazard information beyond the immediate visual warning area through supported platforms.
These technologies do not all perform the same job.
For a fleet manager, the more useful question is:
What does this vehicle need to communicate to road users and workers, and which combination of warning systems supports that requirement?
That approach places the Mini Lightbar Mount Australia decision within the wider vehicle-safety strategy rather than treating the light as an isolated accessory.
A Practical Mounting-Position Checklist
Before finalising a location, work through these questions:
- What is the exact mini lightbar model?
- What mounting methods does it support?
- Where does the vehicle operate?
- From which directions is warning visibility important?
- What equipment does the vehicle normally carry?
- Are roof racks or ladders fitted?
- Is there a canopy or headboard?
- Could normal loads obstruct the light?
- Is the proposed structure suitable for the intended installation?
- How will wiring reach the light?
- Can the equipment be inspected later?
- Does the position work with other warning equipment?
- Will similar fleet vehicles use the same configuration?
This checklist is deliberately vehicle-focused.
The objective is not to identify the most convenient empty space. It is to identify a mounting location appropriate for the vehicle’s normal operation.
Choosing the Right Mini Lightbar Mount Australia Position
There is no universal winner between roof, roof rack, canopy and headboard mounting.
A direct roof position may make sense for one council ute.
A canopy may work better on a utility vehicle with permanent roof equipment.
A rack could provide an appropriate location on a service van where the specific installation supports it.
A headboard may be more practical for a tray vehicle.
The appropriate solution needs to bring together:
- the specific mini lightbar
- vehicle construction
- normal loads
- warning visibility
- surrounding equipment
- operating environment
- compatible mounting hardware
- installation requirements
- maintenance access
For fleets using similar vehicles, a repeatable installation can be valuable where compatibility and vehicle configuration allow it.
For mixed fleets, different vehicles may genuinely require different mounting arrangements.
The important point is that the decision should be deliberate rather than based solely on where there happens to be available space.
Final Takeaway
Where should a mini lightbar be mounted on a work vehicle?
There is no single answer for every Australian ute, van or commercial vehicle.
Start with how the vehicle works.
Look at its roof, racks, canopy, headboard, loads and other equipment. Consider where warning visibility is required. Confirm the lightbar’s mounting requirements. Then compare the available locations.
For Australian fleet operators, this creates a more useful question than:
“Where can we fit the light?”
The better question is:
“Which mounting position allows this vehicle to communicate its warning effectively while working in its normal operating environment?”
That is the decision a well-planned vehicle warning system should answer.
For product-specific compatibility, the Australian Warning Systems Mini Lightbar range and Mini Lightbar Mounting Plates provide further technical and product information.
FAQs
Can a mini lightbar be mounted on a ute canopy?
Potentially. Suitability depends on the canopy construction, mini lightbar, mounting hardware, wiring requirements and final warning-light position. Equipment stored or carried above the canopy should also be considered because it may affect visibility.
Is a roof or canopy better for a mini lightbar?
Neither is automatically better. A roof may provide a useful elevated position, while a canopy can be practical where the cab already carries racks or other equipment. The appropriate position depends on the vehicle configuration, lightbar requirements and intended warning visibility.
Can a mini lightbar be mounted on a roof rack?
It may be possible where the rack and mounting arrangement are suitable. Consider how the equipment will be attached, normal rack loads, ladders, vibration, wiring and whether the warning light remains visible when the rack is being used normally.
Can I mount a mini lightbar without drilling into the roof?
Some warning-light and mounting configurations may provide alternatives to drilling directly into the vehicle roof. The correct method depends on the particular mini lightbar, mounting equipment, vehicle and intended use. Manufacturer requirements should be checked before installation.
Where should a mini lightbar go on a work ute?
Possible locations can include the cab roof, roof rack, canopy or headboard, depending on the ute configuration. The position should be assessed against warning visibility, normal loads, surrounding equipment, mounting compatibility and wiring requirements.
Does a roof rack block warning-light visibility?
It can. The rack itself or equipment carried on it, particularly ladders and long materials, may obstruct a warning light from certain directions. Visibility should therefore be assessed with the vehicle loaded as it normally operates.
Where should warning lights be mounted on a service van?
The roof or an appropriate roof-rack arrangement may be considered depending on the van and warning equipment. Vehicle height, ladders, antennas, roof loads, wiring and the intended warning directions should all be assessed.
Can councils standardise mini lightbar mounting across fleet vehicles?
Yes, where the vehicles, lightbars and mounting arrangements are genuinely compatible. Standardisation can support consistent installation and maintenance, but different vehicle bodies or operational roles may require different configurations.
Should a mini lightbar be mounted above ladders and roof equipment?
The warning light should be positioned with normal equipment and loads in mind so they do not unnecessarily compromise its intended visibility. The appropriate location depends on the specific vehicle and installation rather than simply mounting the light as high as possible.